Thanks to lovely Bianca @luett.huus we came across Mod Podge . We are really excited about this versatile glue and would like to introduce it to you.
To help you find your way through the Mod Podge jungle, we have created a small overview with ideas and inspiration so that you can get started on your favorite projects right away.

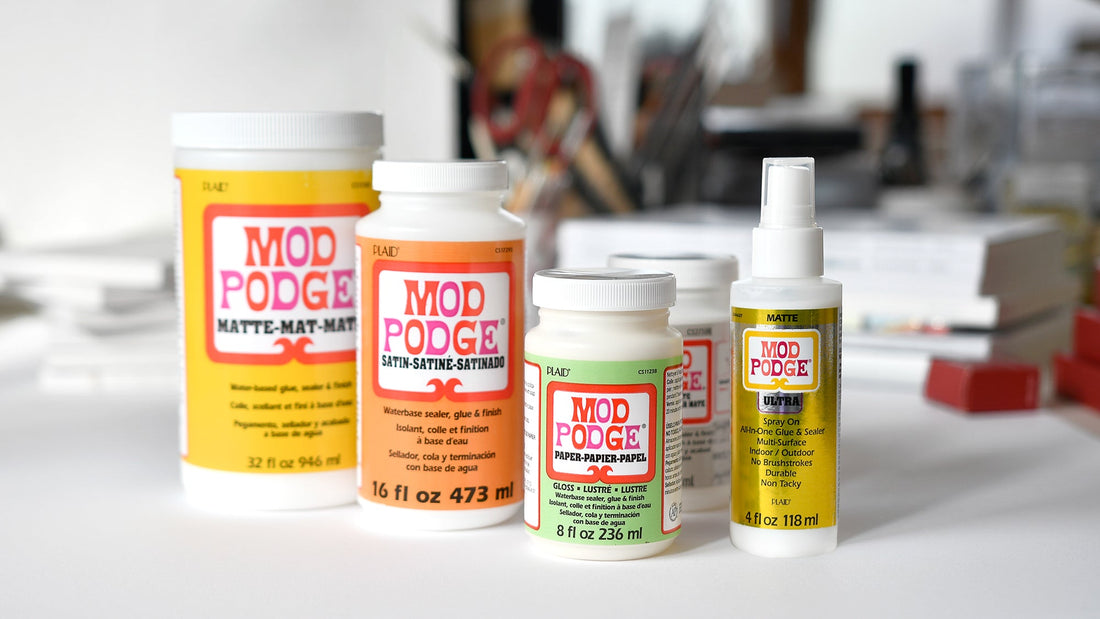
What is Mod Podge?
Glue, seal, protect. That's the Mod Podge 3-in-1 formula.
The glue is water-based and dries transparent. It also applies a sealing layer of varnish that protects your project from external influences and is even water-repellent.
Often, the difference between the various products only becomes apparent in the protective finish. It can be matte, shiny, give a silky appearance or make your project durable against scratches and damage, like with the lovely Bianca.
The perfect notebook
Using designer paper , a bone folder , scissors , a wooden roller and Mod Podge Hard Coat, Bianca quickly conjures up a small, water-repellent notebook that is perfect for your next trip.
So you no longer have to worry about your coffee or tea cup on the craft table. The notebook can simply stay where it is 😉
Tip : Mod Podge is also super easy to remove from hands or tools with warm water and soap, which also makes it a great companion for crafting with children.
You can find the reel with the instructions on Instagram at @luett.huus


Ideas, tips and tricks for use
The right scissors
Anyone who enjoys crafting or works with book cloth will certainly be familiar with the problem - as soon as glue is involved, it is often not just what is supposed to stick that sticks, but also the paper on the scissors.
Do you know? Then definitely try the new non-stick scissors from Fiskars. You'll have fun crafting with them!

The ideal tool
To ensure that everything goes smoothly when working with glue, not only the right scissors but also the right tools are important. For this reason, we recommend using a nylon brush
After cleaning, the synthetic fibers are ready for your next idea because the "brush hairs" do not stick together.

Important
Apply each layer carefully, thinly and evenly and allow it to dry.
Step by step
Bianca shows you the individual steps in her reel. Here is the link to her channel @luett.huus .
Once you know what you want to do and what surface you are working on, you can determine the right Mod Podge formula for the project.
Mod Podge Overview
The following formulas differ primarily in their surface finish and thus determine the appearance of the project.
Tip : The difference in the finish is often only visible once everything has dried.

- Mod Podge Mat t gives projects a matte finish.
- Mod Podge Satin gives projects a silky or subtly shiny finish.
- Mod Podge Gloss gives projects a glossy finish.
- Mod Podge Super Gloss gives projects a high gloss finish.
- Mod Podge Ultra Gloss Spray gives projects a high gloss finish.
The following formulas differ from each other mainly in their function and application:
- Mod Podge Hard Coat provides a subtle sheen, durable coating of protection against scratches and damage for projects that endure a lot, such as utensils.
- Mod Podge Paper Matte is suitable for all types of paper, including photos. Gives a matte finish.
- Mod Podge Paper Gloss is suitable for all types of paper, including photos. Gives a glossy finish.
We hope you enjoy getting to know and trying out this technology.
What project would you like to do first with Mod Podge? Let us know in the comments!
From us to you ⭐
3 comments
Hallo Margitta,
Danke dir für deine Frage :)
Mod Podge kann als Kleber aber beispielsweise auch als Versieglung von Designpapier verwendet werden. Um beispielsweise ein Softcover zu gestalten, klebst du zwei Papiere mit Mod Podge einfach zusammen und trägst dann auch den Mod Podge deiner Wahl außen auf den Papieren auf.
Dann kannst du auch auswählen, ob du lieber einen glänzenden, matten oder satin Effekt haben möchtest :)
Ich hoffe wir konnten dir helfen ❤️
Liebe Grüße
Lara
Hachz, liebe Bianca, wie toll ist das denn. Wird direkt ausprobiert und ist bereits im Körbchen gelandet. So eine tolle Idee, vielen Dank fur eine so feine Inspiration ❤️
Hallo, der neue Kleber hört sich hochinteressant an. Mich irritiert allerdings eines: bei den 5 zuerst genannten Produkten handelt es sich doch um Kleber? Bei mir kommt der vor allem
unter das Produkt (Papier, Pappe, Leinenpapier etc.). Wie kann er dann das geklebte Material
hochglänzend etc. machen? Schlägt der Kleber durch ?
Wenn man die letzten 4 Produkte über das aufgeklebte Papier streicht, kann ich mir den Glanz etc. natürlich vorstellen. Leider kann ich nicht auf Instagram nachschauen, da ich dort nicht angemeldet bin. Gibt es zu dem Thema noch mal ein kleines Video bei youtube oder Pinterest, da komme ich ran. etc.? Kann auch per Handy nix machen – hab’ keins. Mit herzlichen Grüßen Margitta