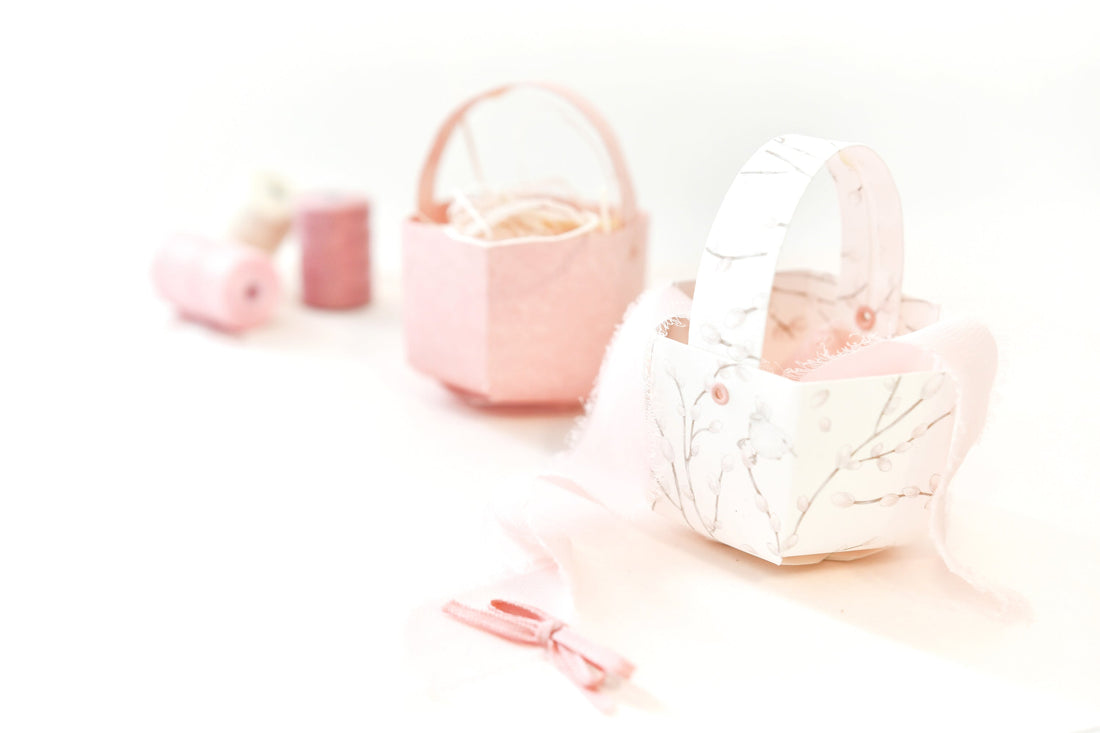
There is enough space in the smallest basket ! Today we have a beautiful Easter basket for you that you can quickly and easily recreate at home.
All you need is as follows:
Material for 2 baskets
- 1 sheet of design paper
- 4 eyelets
Tool
- Scissors
- Cutting and folding board
- Eyelet punch
- Glue/double-sided tape
- Pencil
- Bone Folder
- triangle ruler
- Optional: Cutter
Cuts
- Large basket 25 cm x 12 cm
- Small basket 25 cm x 11 cm
- 2x handles each approx. 15 cm x 3.6 cm

Step 1
Cut a piece of design paper with the measurements
25cm x 12cm too.
The motif side should be on the back, i.e. not visible.
Place the long side on the folding board and pre-fold the lines. Place the short side on the folding board and fold at 2.5 cm
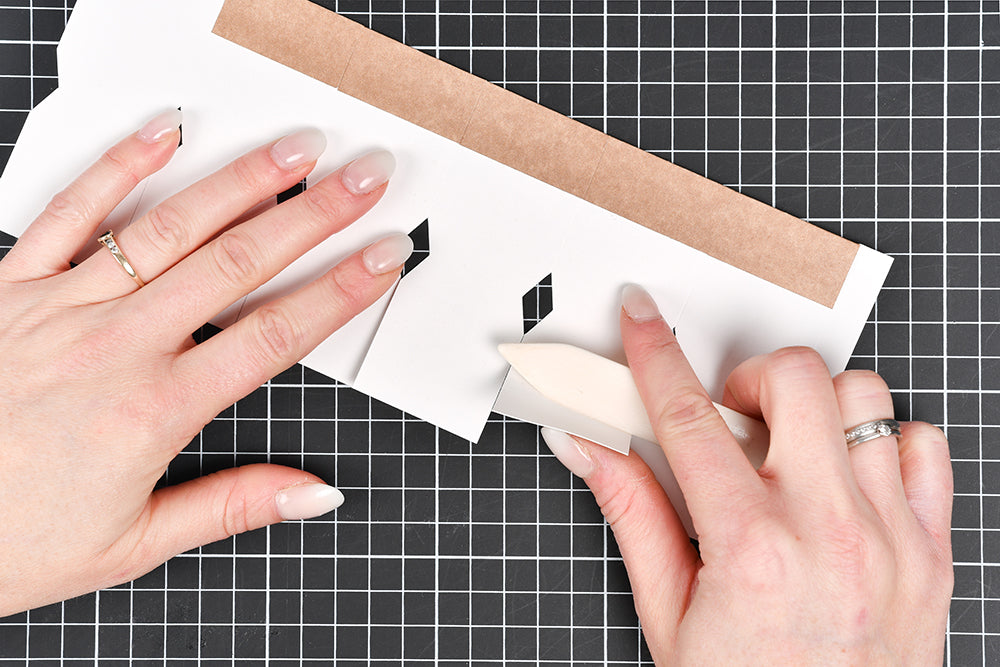
Mark a point on the fold line with a pencil at a height of 7.5 cm . Then cut the fold lines at the top edge up to the 2.5 cm fold line.


Step 2
Starting from the marking points at a height of 7.5 cm , draw further points: on the right and left at 0.5 cm each and at the top and bottom at 1 cm each. Connect the dots to create a diamond.
Cut out the diamonds by folding the respective horizontal fold line and cut the adhesive tab on the right edge by removing the top and bottom rectangles.


Step 3
Now also cut the lower fold lines up to the diamond. Bend the top tabs 2.5 cm high and glue them in place. Please note! The last tab still remains open.


Step 4
Round the bottom flaps slightly inwards using the bone folder.
Now apply glue to the adhesive tab on the right (back) and close the paper into a circle to form the basket. Now the last top tab is bent over and glued on. Again, make sure that the motif side of the paper is on the outside.


Now it's time to attach the opposing tabs to the bottom of the basket by carefully gluing them together up to the start of the diamond.


Step 5
For the handle, cut a strip of design paper approx. 15 cm x 3.6 cm . (You can change the length as you wish). Fold the short side on the right and left at 0.9 cm , fold this over and use the folding bone to bend the strip into a slightly rounded shape.


Step 6
Now you can put the eyelets. To do this, take a suitable base and the eyelet punch.
Punch two holes in the top and bottom of the handle and also in 2 opposite sides of the basket.


To insert the eyelets, insert the handle and connect the basket to the handle through the eyelets. If you use this eyelet punch , be particularly careful when loosening the spring so that the edge of the basket does not get caught.


Your basket is now ready and, as always, you now have the opportunity to fill it with a variety of fluffy, colorful or lovely little things and decorate it according to your own personal ideas. Let your creativity run wild and design your basket into a unique and individual piece of jewelry.

We hope you enjoy crafting.
From us for you ⭐
Alexandra & graphics team
The instructions are subject to alexandraRenke's Angel Policy.
This can be found at www.alexandra-renke.com.
Alexandra Renke
51503 Rösrath, Germany
© alexandra-renke.com
All rights reserved.