You really don't need much to bind your own book - but the result is unique and you can store memories, write stories and package love in a very individual way.
Required material:
-
Gray cardboard bundle consisting of 2 large parts of gray cardboard, 1 narrow part of gray cardboard and a packing paper cut
-
book linen
-
Design paper
-
Book block
-
Book glue (add a little water)
- Paint roller or brush
- rubber roller
- Bone Folder
-
Scissors
-
Pencil and eraser
- Scrapbooking paper
-
triangle ruler
-
cutter
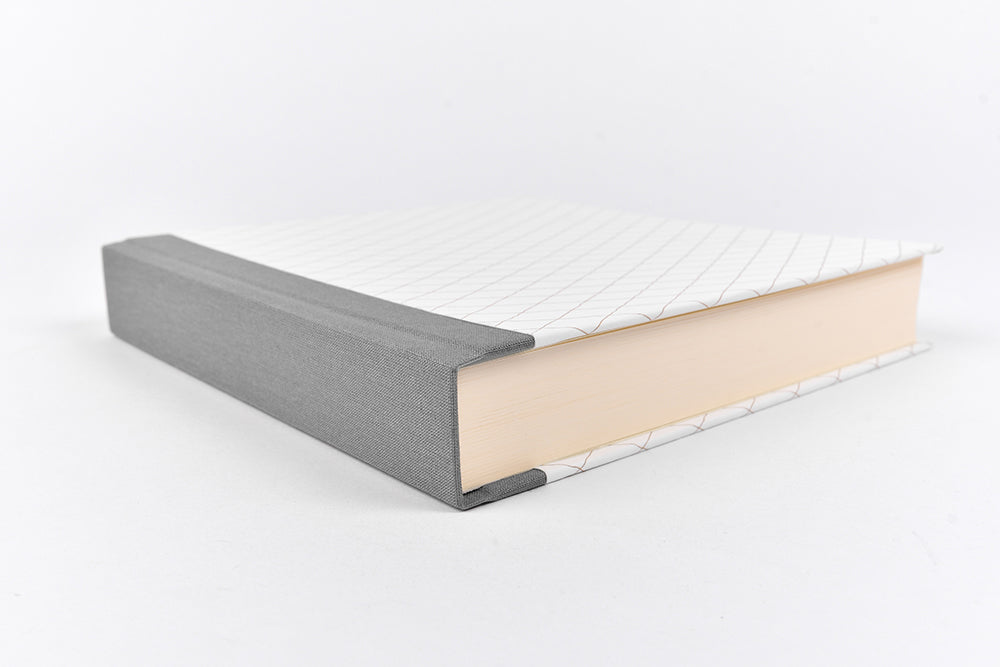
In our example we want to process the book block 19 x 19 cm and the gray cardboard bundle 3 .


First, the book cover is prepared.
To do this, glue the narrow strip of gray cardboard (3 x 19.7cm) for the spine of the book in the middle of the wrapping paper (9 x 19.7cm). Be sure to mark the dimensions for placing it so that it is actually in the middle. You should then trace the edges on the back with the bone folder.


The two large pieces of gray cardboard measuring 18.7 x 19.7cm are now glued onto the wrapping paper. To do this, mark the wrapping paper at a distance of 1cm from the spine of the book and coat the narrow strip at the edge (2cm) with glue.
Glue the two pieces of gray cardboard onto the wrapping paper at the markings and press them firmly with the bone folder.
The wrapping paper is flush with the gray cardboard at the top and bottom.


Then turn the whole thing over and glue the book cloth (9 x 23.7 cm) in for the spine lamination. Stick it in the middle of the wrapping paper and the gray cardboard (the narrow strip of cardboard is on the back). Make marks with a pencil beforehand. The linen now protrudes 2 cm above and below and will later be attached with the design paper in one step.
If you get glue on your book cloth, you can remove it with the glue eraser .


Now the book cover is laminated.
The two design papers measuring 19 x 23.7cm are now glued in and thus conceal the two gray cardboard. The design paper will overlap the book linen by approx. 5 mm, this creates a nice transition.
Make sure that the motifs on both papers have the same orientation and then press everything down using the rubber roller.


Before the protruding edges are glued, the corners must be trimmed with scissors.
Maintain a distance of 3 mm from the cardboard and use a set square to help you do this. If the glue has dried on the protruding edges, you can glue them again. Then first fold the top and bottom strips inwards.


Tip:
The protruding edges are easier to attach if the edge is first placed on the
The work surface is set up and the paper is folded over with the folding bone and pressed down.

Then repeat the same with the side strips and press firmly with the rubber roller.
Beforehand, you should fold in the corners a little with the bone folder.
When handling glue, always make sure your work surface is clean. Be sure to remove the glue from your work surface with a damp cloth after each step!


The last step is to glue the book block in place.
Place the book block between the cover so that the protruding edge of the cover is evenly wide on all sides. The spine of the book block lies approximately halfway between the edge of the large gray cardboard and the narrow gray cardboard.
For the inside pages, it is best to place a scraping paper under the first sheet of the book block to coat the cover paper with glue.
Spread the glue from the center outwards. You can now remove the scratch sheet and close the cover. Press the back of the lid
from the outside against the spine of the book block. You can now open the cover again and press the paper firmly with the rubber roller.
Now repeat this step on the back.


To prevent the moisture from the glue from penetrating the book block, place clean paper between the book block and the cardboard and press the workpiece for 24 hours.
You can then decorate your spine and cover and of course fill your book with life.
Have fun with it!
From us for you!
Jennifer


The instructions are subject to alexandraRenke's Angel Policy.
This can be found at www.alexandra-renke.com.
Alexandra Renke
51503 Rösrath, Germany
© alexandra-renke.com
All rights reserved.
All rights reserved.
3 comments
Vielen Dank für die tolle Anleitung👌🏼 ich werde das auf jeden Fall mal ausprobieren. So hab ich mein Bucheinband noch nie gemacht. Liebe Grüße Annett
Super Anleitung, aber eine Frage habe ich noch: Wenn ich die Innenseiten an das Buchcover klebe, wird die Gaze mit Leim eingestrichen oder bleibt die frei wir bei Buchrücken? Hinten ist es bei mir oft sehr stramm….geschlossen passt alles perfekt, aber beim Buch öffnen, könnte es hinten fast einreißen….Lieben Dank für eine Antwort Herzliche Grüße Anke
Ganz lieben Dank für diese Anleitung, ich seh sehr oft Menschen, die doppelseitiges Klebeband oder Flüssigkleber nehmen, aber das ist nicht dasselbe. Danke für das Original.